Do you want your YouTube Intro Video to stand out and be different to all the rest? Why not create a powerful still background image, logo or border and apply them to your YouTube videos. We will show you how to do this with free and/or Open Source software. It does not matter what background you have behind you and with this method you certainly do not have to create and pay for a fake desk, with pot plants or flashing neon signs in the background, like most other YouTubers do anyway. It is important to create adequate lighting and have good sound as well as have a tripod for your camera or iPhone. Invest perhaps $100 to $200 in better than average quality equipment first up. I found that WP creator explains how to set up your recording station best in this video: How I Make YouTube Videos, Circle Bubble Effect, Office Tour, And Software Stack: http://www.WPCrafter.com / https://youtu.be/PXIjudhIqhc
Here’s our step-by-step video: https://youtu.be/2xHKaoGYMPI
Here’s our YouTube intro video that also doubles up as our Patreon video: https://youtu.be/NC-wizYkZnM
Our intro is designed to be delivered by the owner of a company that just so happen to make videos. It kind of goes against the norm for introducing a YouTube channel. Generally speaking it has to be passionate and personal, connect to the viewer according to Evan Carmichael at http://www.evancarcmichael.com.
Point number one. Start with a powerful opinion, what do you stand for? What is wrong with the world right now? There is nothing that makes you stand out against everybody else. Like minded people will flock to you. I once heard try and talk in that voice that you would have if you were given tickets to go and watch the SuperBowl, not a fake voice that you typically hear DJ’s use at a club. When you play the final take back to yourself and it could take 50 or 100 takes, you need to get excited yourself and say YES that IS why I am starting this channel.
Point number two: Tell your story. Who are you? Why should I care? Where did you come from? Don’t relate it like a resume. Nobody cares about that. Through your story your viewer is going to become a better person. Let’s say your passion is about entrepreneurs and when you started you were making three hundred dollars a month, not able to survive, you never thought you would ever make it and you had opportunities to take other jobs but you persevered because you did not want to live with regret, and work for someone else and not being able to be your own boss.
Point number three: Tell me what I get? What is the channel going to be about? How often will I be bringing out videos?
Finally number four is: Connect with your audience and ask them to comment and how much you value their feedback. Remember to respond to every comment and be thankful for the interaction.
With that said, let’s look at creating a fake background for your video introduction. Okay that did not sound right did it? If you don’t make it obvious that it is fake, people may think you are trying to pull a fast one. The way we expose the static background setting is to create a transitional effect right in the beginning where part of the old background is revealed for a brief second or two. More on that later and we use Windows Movie Maker to create that effect. At the end of this Tutorial I list a download link to all the FREE tools I used to make our own Intro Video. I found that filming myself against a large background image saves a lot on editing time especially if your head moves around a lot which it will tend to do. In my case I filmed it against a 40 inch TV monitor with our company logo on a slideshow repeat in the background. As we will see later I should have lowered my seat slightly as there is an area in the video that still shows the old background because I had to compensate for that as my head was moving around. You’ll see what I mean.
Here are the steps:
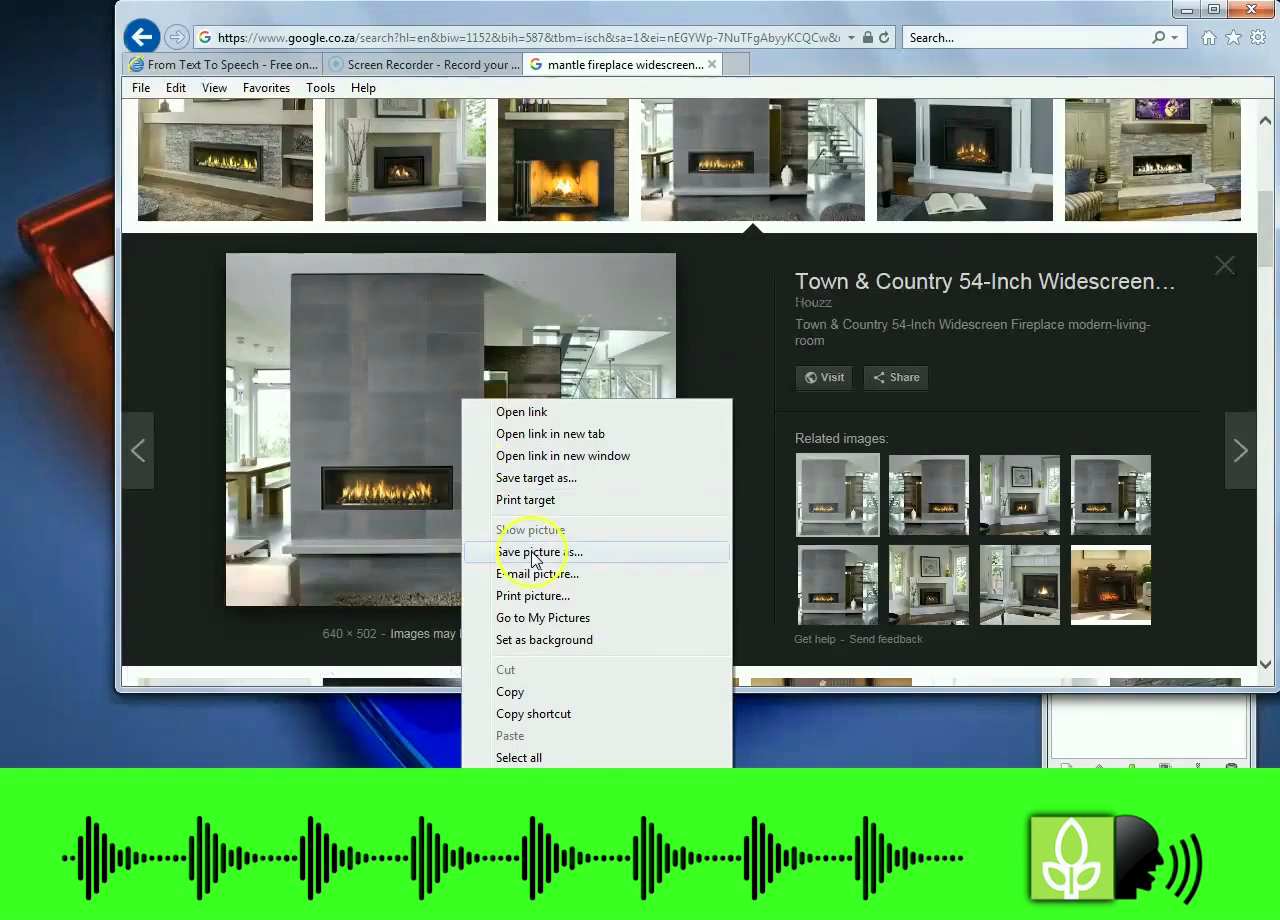
Step 1: Browse the web for an appropriate image background on Google image search. Search for “mantle fireplace widescreen” or similar search phrase under the images tab. Download the image by Left click, let it load, then RIGHT CLICK >SAVE PICTURE AS to a new folder you created on your PC, Laptop or Mac.
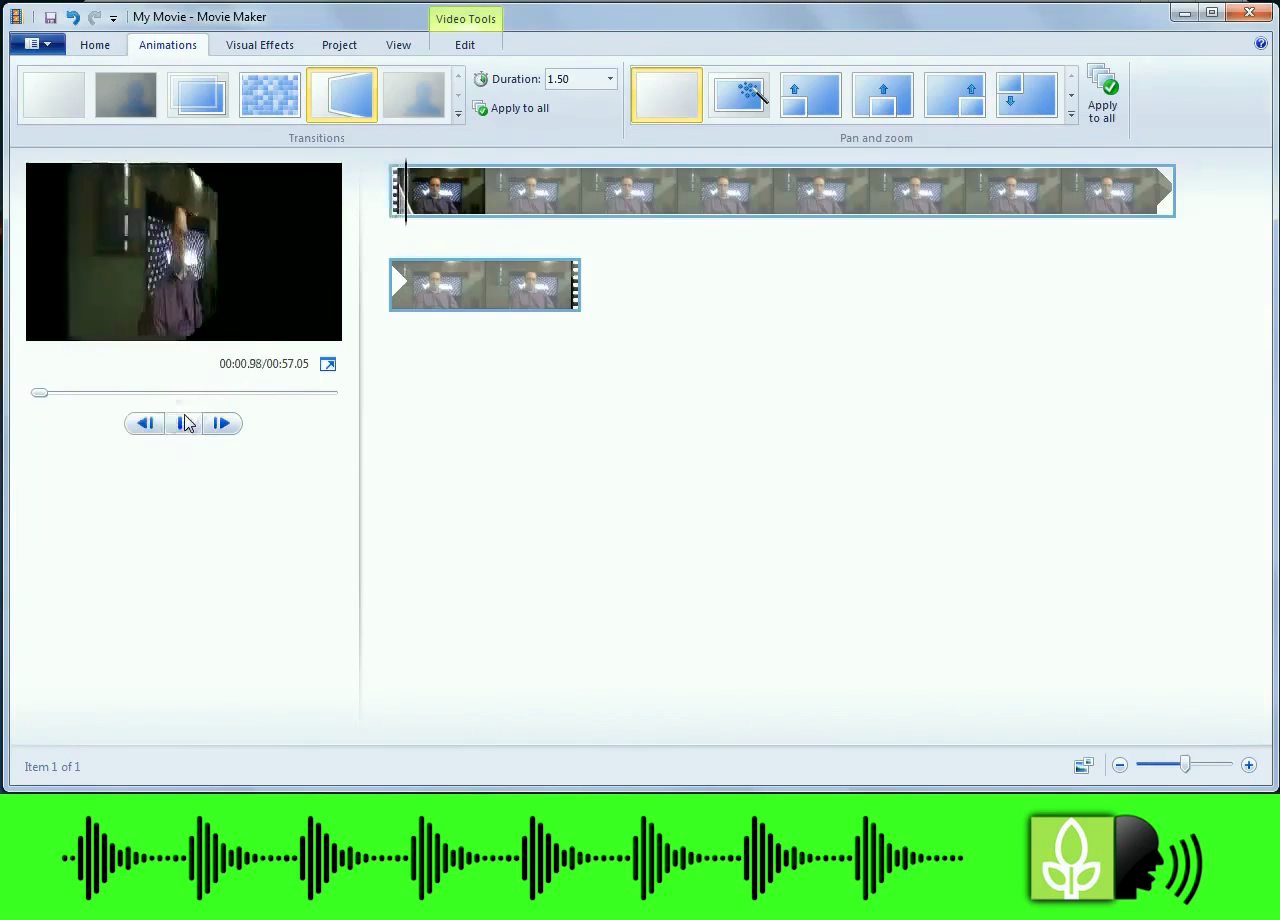
Step 2 : Film yourself and upload the video into Windows Movie Maker or similar program to allow the video to animate through a transition effect as it starts up and just before you start talking. You can leave this step out but in my case I had to show my viewers that the background image was a way to show creativity and not to fool the viewer.
Step 3: Download Avidemux, an awesome free video cropping and editing software and open it up. See the link to download this application at the bottom of the post. Import the Mp4 file created in Windows Movie Maker into Avidemux. Start playing the video and stop it at any point of the video. Go to FILE> SAVE IMAGE> AS BITMAP and save it to the same folder you created earlier.

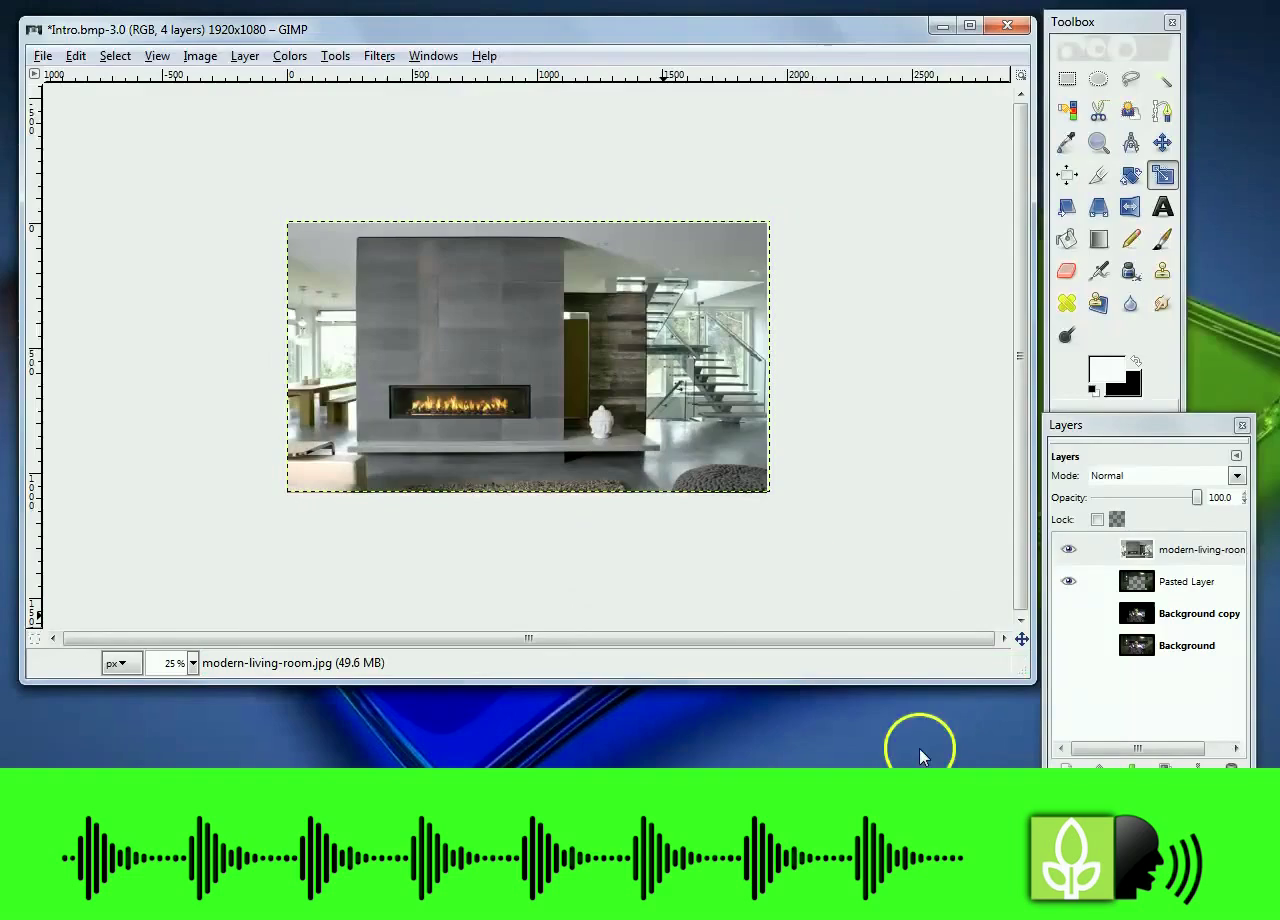
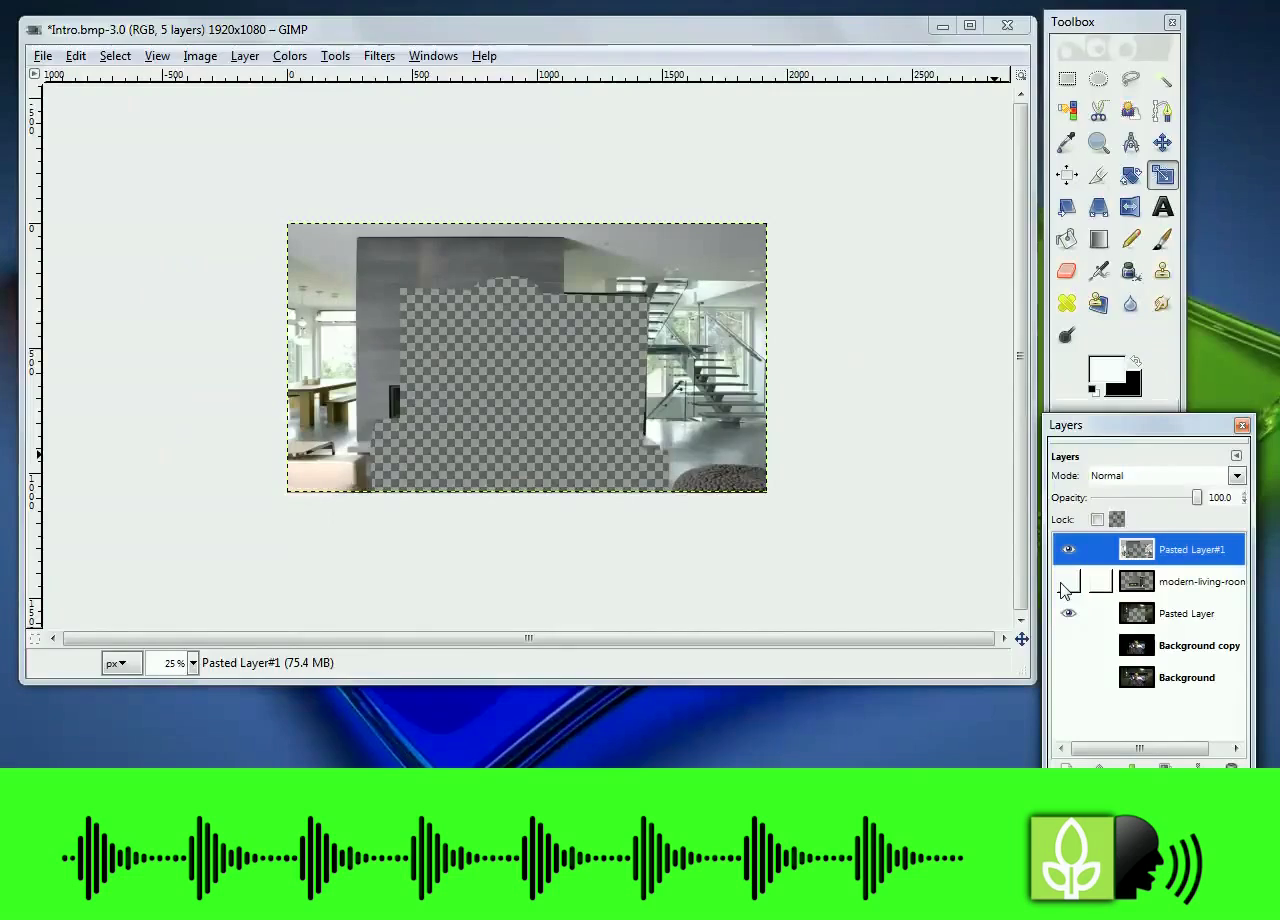
Step 4: Start up your favorite image editing software, I used Gimp, and open the the image still-shot just created. Here I am showing in Gimp how to create the background image. Before starting this process make sure the background image is looking tip top. In Gimp I go to COLOURS> LEVELS and set the LEVELS to AUTO to bring out a more vivid image. Carefully crop around items on your image you want to LEAVE in the video. We want to create a border but leave some items or features inside the video display. Cut and past the border to a new Layer. You are now left with a border that will be eventually layered over the video to hide the background on your current video. In Gimp I have to “Add an Alpha channel” to highlight background image as a shape and not by colour pixel, which ensures transparent area is saved as see-through and not a white background. To ensure the transparency is achieved we have to save the border or background as PNG file.

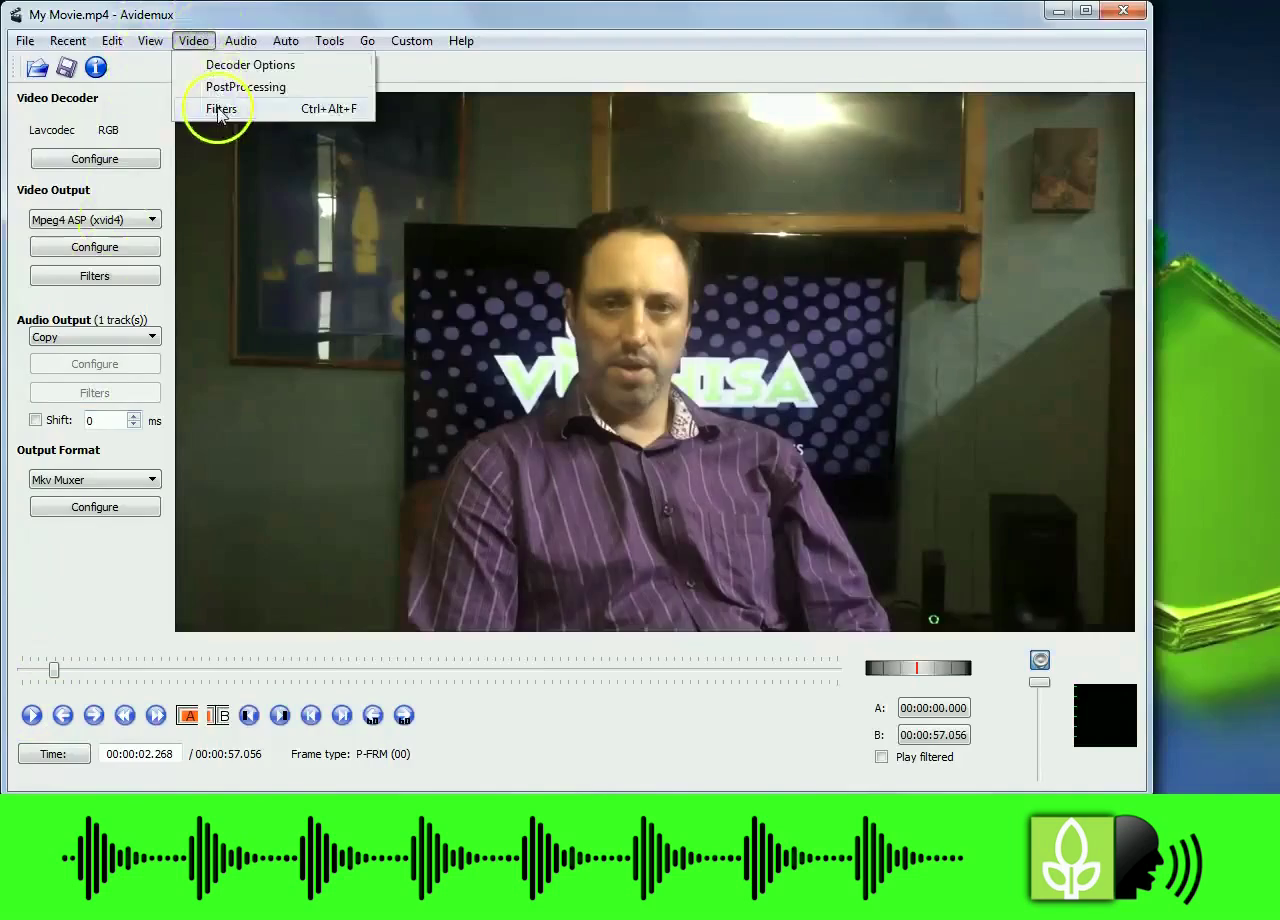
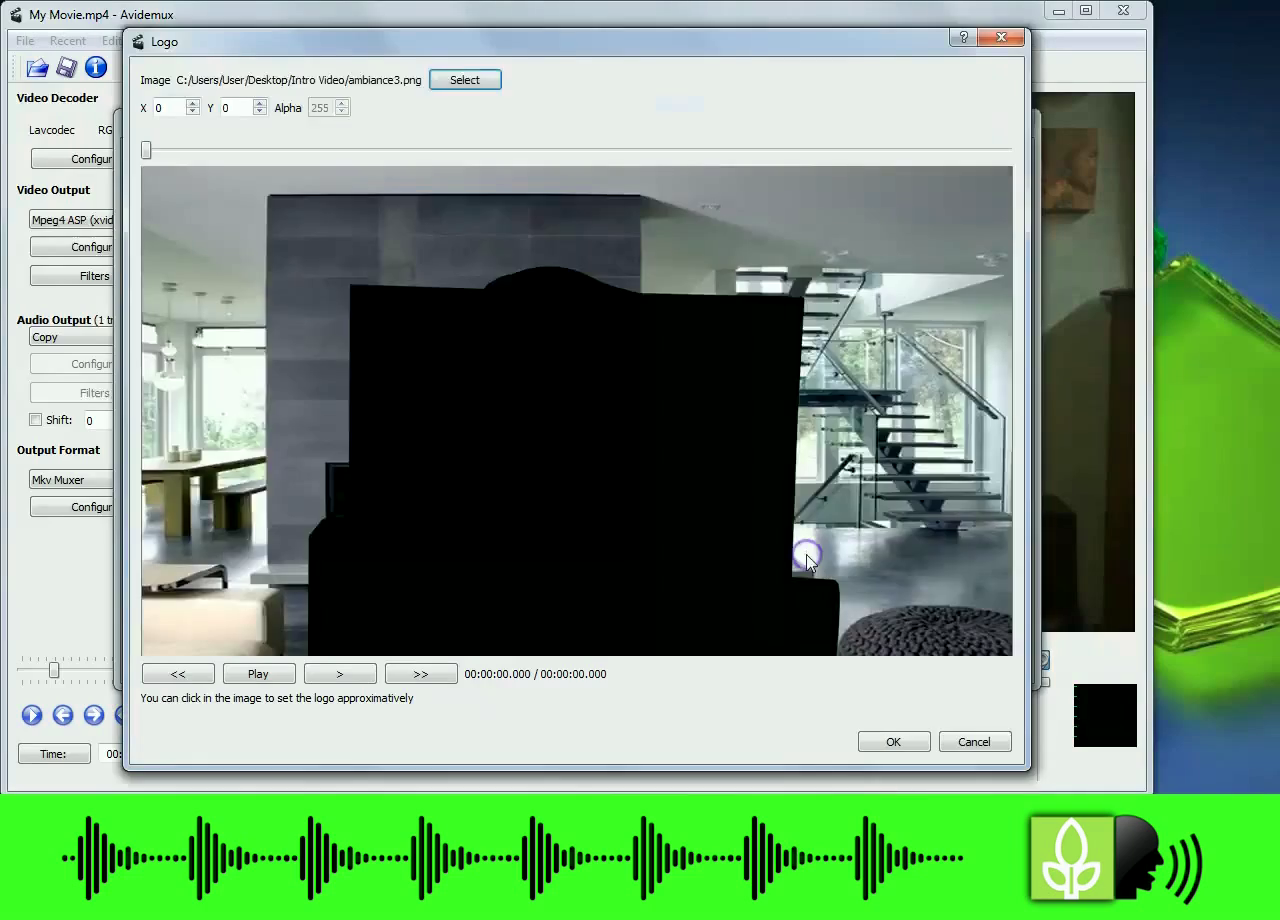
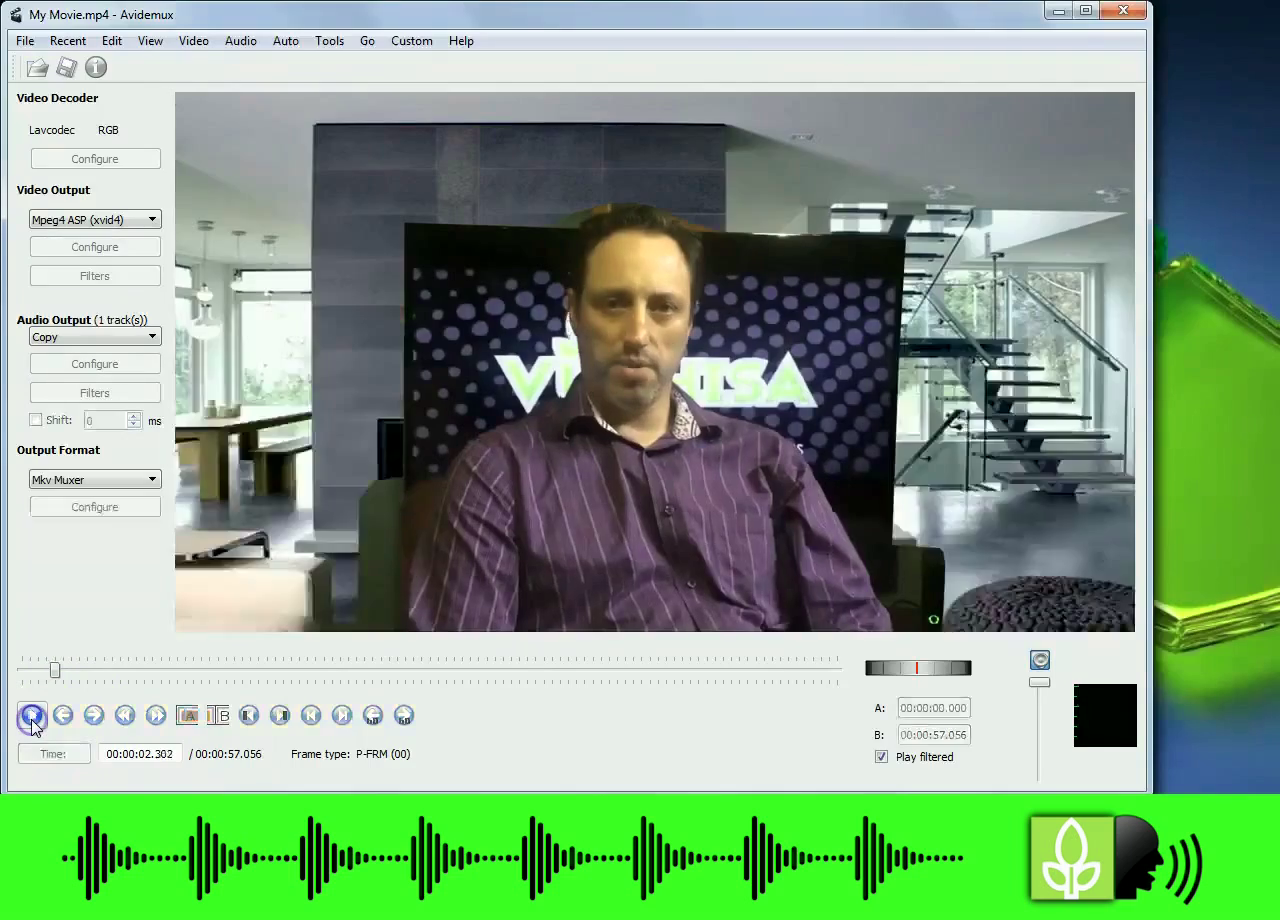
Step 5: Open Avidemux again and open the file created in Windows Movie Maker, but it should still be open as we created a still image earlier from the same video. Select VIDEO OUTPUT> Mpeg4 ASP (xvid4) on the drop down menu on the left before you do anything else. Now select VIDEO> FILTERS from the top menu bar. Double Click on ADD LOGO then >SELECT and upload the PNG file you just created. Move the image around as shown to ensure there’s a thorough coverage over all edges of the template. Close that window. On the main screen you still wont see the border created, so first tick the box SHOW FILTER. Press play and the filter you added can be clearly seen! Click FILE >SAVE and the file will save as a MKV file, which is the extension for Avidemux. You already selected video output as Mpeg4 earlier, but although it applies all the filters and saves it in Mp4 format the file extension remains MKV.
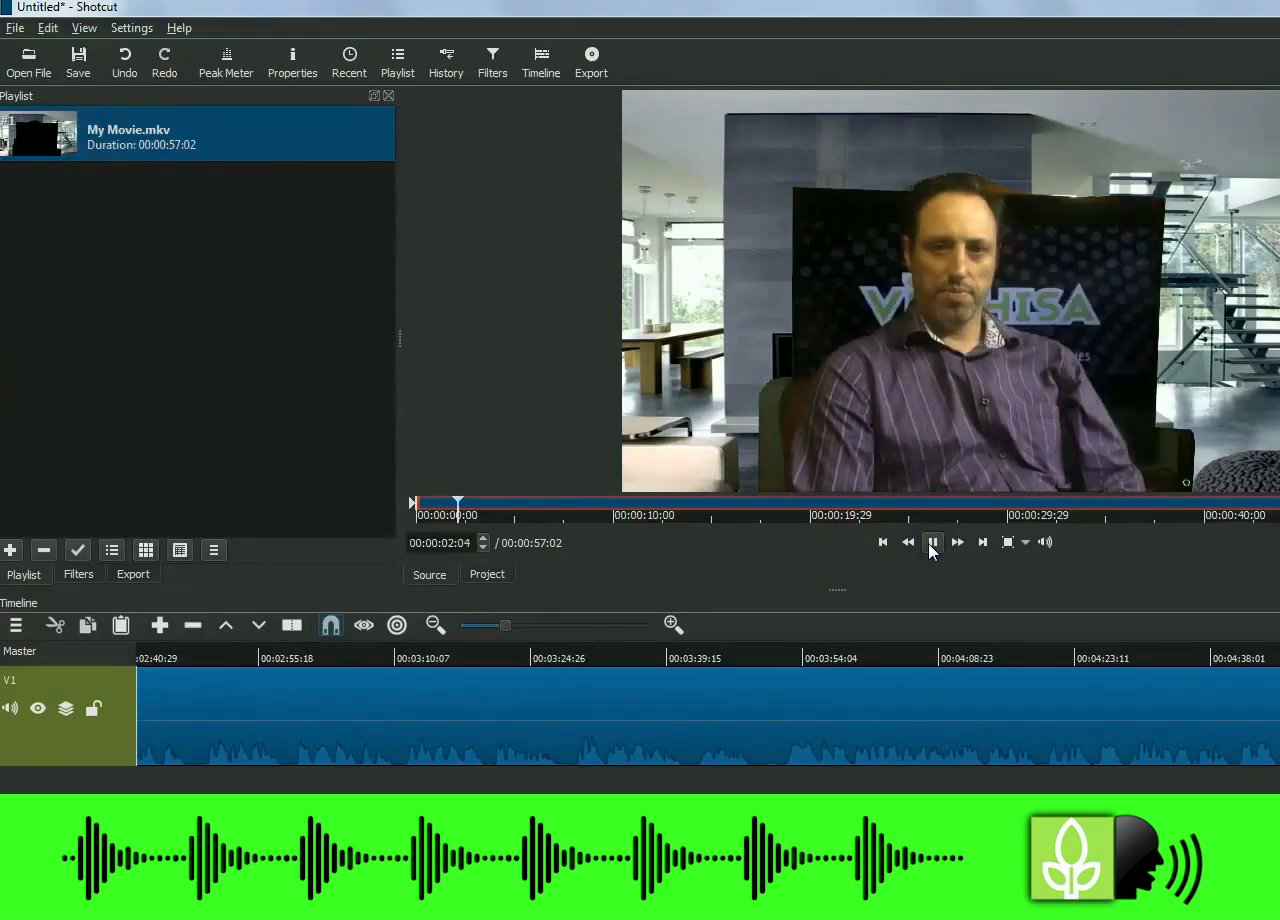
Step 6: Don’t worry though as a final step you can convert this file into a Mp4 in Shotcut as I demonstrate in my Tutorial video. You can use Shotcut to add further effects prior to saving it as an mp4 file for upload to YouTube.
Feel free to list your video links in my YouTube video comments section to show me how it worked out for you.
I used these FREE and Open Source tools:
http://avidemux.sourceforge.net/ Allows you to add static logos and borders on your YouTube videos
https://www.gimp.org/downloads/ Creates the border image as a PNG file
https://shotcut.org/download/ Crop and edit your MKV videos
https://www.windows-movie-maker.org/ Create swivel video transition effect
I would like to refer you to http://www.evancarmichael.com/support/ for his helpful video to those wanting to create an awesome intro video: https://youtu.be/-w3a8NlHAaE
Create awesome content on YouTube using TubeBuddy: https://www.tubebuddy.com/vuthisa